I took a Costume Construction class in college and loved it, so my husband bought me a sewing machine one year for Christmas. I’m still a beginner, but I love simple projects. My most recent endeavor was to make our Christmas stockings. This is fairly easy, but I couldn’t find a complete tutorial online that explained everything, so I had to piece together different ones. This made me feel like I should make my own tutorial, in case someone else has this exact same problem. Note: I used two different stockings for this tutorial…sorry if that’s confusing, but flannel is the outside fabric and the lining is either cars or owls.
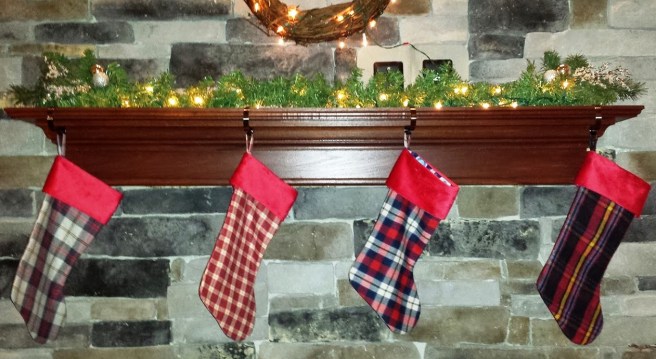
I wanted to make a classic Christmas stocking, with a cuff at the top. I envisioned them being made of soft flannel, but I didn’t want them to all look the same, so I picked four flannels that all went together. Flannels aren’t really something that match, so I chose a color (red) and made sure they all had it somewhere in the pattern. That’s also the color I chose for the cuff.
I bought a yard of each fabric because I knew I’d probably mess up at some point. You will also need a fabric to serve as the lining. I didn’t really care what the lining looked like, so I just used some leftover fabric from my son’s birthday shorts. Yes, it may be owls and cars, but I figured it would make an interesting story someday. You could probably get by with 2 yards of lining fabric for four stockings, but again, I always get more in case I mess up. Wash all your fabric and iron it.
A note on lining: You might be like me and foolishly think, “I’m not going to put a lining in a stocking, no one will see it! What a waste of time!” This would be a mistake because then your stockings will hang very sadly. The lining stiffens them up a bit so that you can actually tell that they are stockings. Plus, it is so easy to do and doesn’t take any extra time.
First, find a pattern. There are so many free stocking patterns online, but this is the one I chose because it is exactly how I wanted them to look. If you can’t find one you like, make your own! Print the pattern, tape the pages together and cut it out. If your fabric has a “right” side (the part that people are supposed to see), fold it in half so the right sides are together and all you see is the “wrong” side (the part that you don’t want people to see). Do the exact same thing for the lining, then stack both fabrics together. Pin the pattern through all four layers of fabric and use some sharp crafting scissors to cut out the stocking shape.

When you finish, you should have four pieces of fabric (two lining and two flannel) that all match up perfectly. Remove the pattern and repin the pieces together just as they were. Here’s what mine looked like, I flipped the toe over so you can see the other side.

Then, this will sound totally crazy, but sew all four layers together, leaving the top of the stocking open. Next, get ready to have your mind blown. Reach into the stocking, between the two lining layers, grab the toe and turn it inside out.
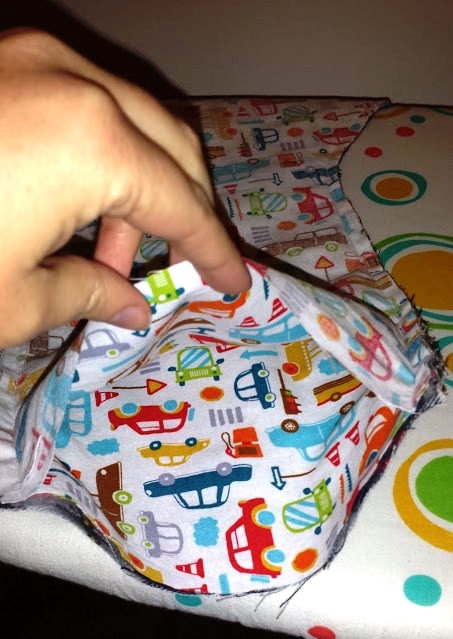

You should see the right side of the lining. Reach into the stocking again, between the two flannel layers, grab the toe, and turn it inside out. WTF?! You should now see the right sides of the flannel and it should look like a stocking without a cuff.

I don’t know how this witchery works, but I was really impressed and may have done it 10 or more times, then proceed to demonstrate it to my husband 5 more times in order to properly marvel over the magic. Obviously, I am easily amused.
Make sure you reach inside and get the stocking fully turned so that it’s the right shape. Then iron the stocking.
Next, you need to make a loop to hang the stocking. If you don’t want to make it, just find some nice ribbon and cut a piece about 6” long. I wanted my loops to match the stocking, so I used the same fabric. I cut a piece about 6” long and 2” wide. I folded the long ends into the center, ironed them down, then folded the whole thing in half, ironed it and sewed as close as I could to the edge.
Turn the stocking inside out again. I wanted the toe to point to the right, so I pinned the loop on the left, lining it up with the seam. If you want the toe to point left, pin the loop on the right.
It can be a little tricky to figure this out, but you want to pin the loop upside down, with the closed end pointing towards the foot of the stocking. You can let the two ends of the loop stick out over the top of the stocking a bit to make sure you sew it.

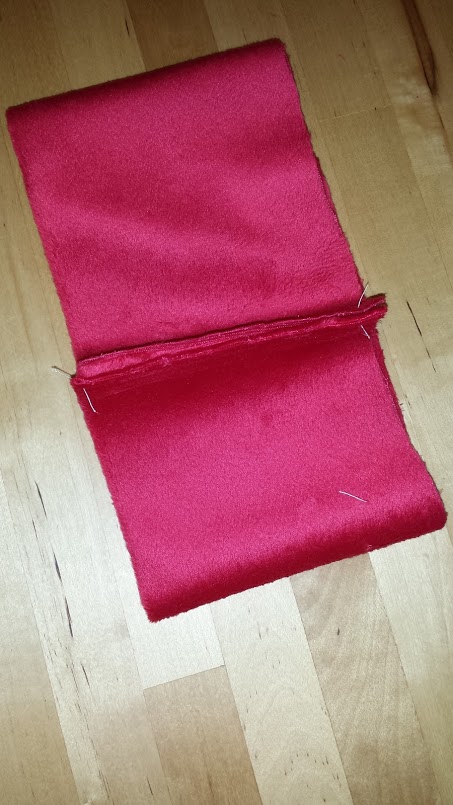
Now, we make the cuff. Measure the opening of the stocking, double the measurement and add ½” to 1.” I went with 1” because I am prone to messing things up on the first try. This measurement will be the length of the cuff. I wanted it to be about 4” wide when finished, so I cut a piece that was 8” wide and folded it in half.

Iron it, then sew the short ends together, so that it makes a circle.

Put the cuff around the top of the stocking with the raw edges (not folded) together, lining up the seams. Pin it to the stocking. It’s okay if the cuff is slightly larger than the opening of the stocking, just try to distribute the extra fabric evenly. The loop will be under the cuff. Sew all around the top edge. I think it’s officially a ¼” seam, but I just tried to keep the edge of the fabric even with the edge of the presser foot. The fabric layers will be pretty thick in the loop area, so your machine might have trouble going over it. If it does, just sew that section by hand.


Turn the stocking right side out, then flip the cuff over.

The loop should stick right out of the top.

Get everything flipped and folded just right, then iron it and you are done!